Showing posts with label Arts and Crafts. Show all posts

Friday, January 6, 2012

Advent Calendar: Early or Late?


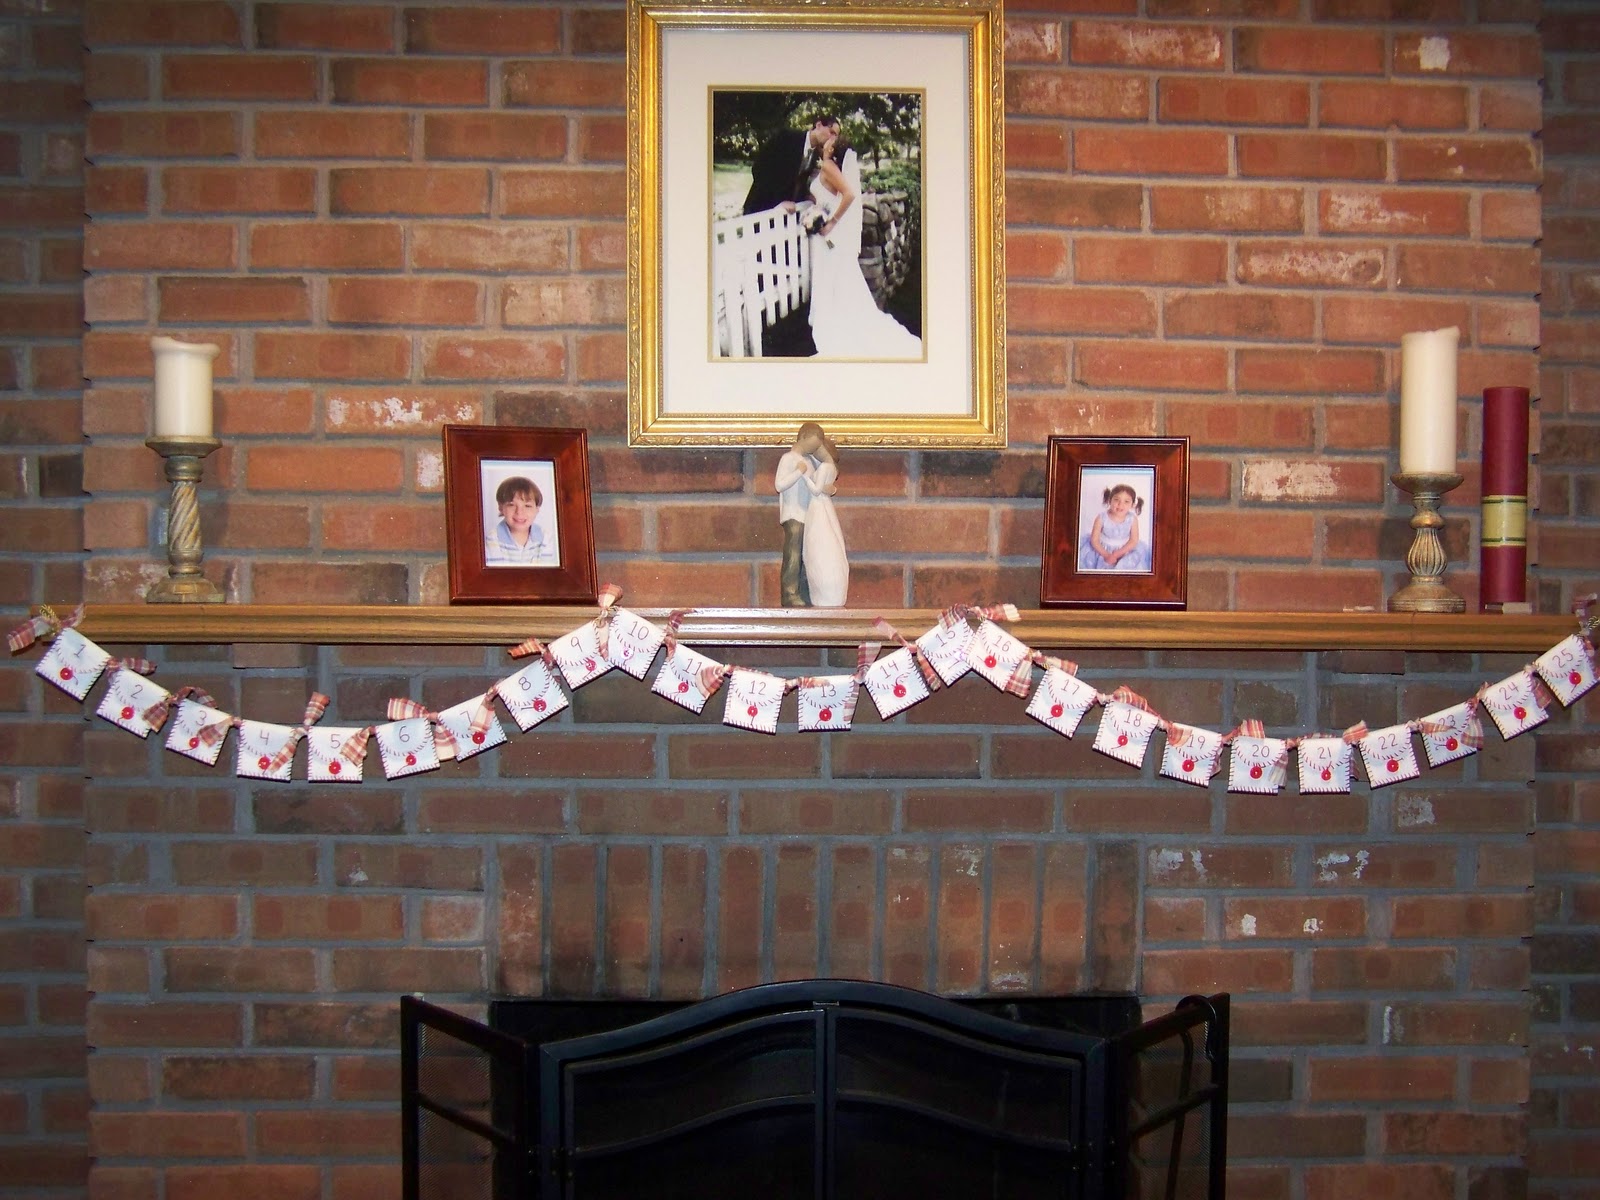
Depending on how you look at this, I am either very late or extremely early.  I just finished making an Advent calendar for my family.  I found this idea Thanksgiving weekend, but I pretty much knew from the start, that there was no way I would have the time to put it all together by December 1st.  So, I went ahead and began the project anyway in the hope that I could at least work on it while the Christmas spirit was still in our house and then tuck it away with the holiday decorations for next year (which, incidentally, is now THIS year).


I can't wait to fill these little pockets full of surprises for my little ones!  By the way, these pockets are just the right size for a Ghirardelli chocolate square!  I think some round peppermint candies would also fit in them nicely.  

Another idea that I really like is to put notes in some (or maybe all) of the pockets.  Each note can have an idea of a Christmas-related activity to complete as a family -- such as bake cookies, make holiday greeting cards, or go look at Christmas lights, etc.  At the bottom of this post, I have included a list of web sites I came across that have ideas to use just for this purpose.  Next Christmas should be lots of fun!

I already took down our Christmas decorations from the mantle, but you at least get the idea here.

And, if you're interested, here is another Advent calendar idea that I contemplated making.  It's a Christmas tree design with pockets underneath the tree.  Really sweet!

Web pages with more Advent calendar ideas to inspire you:

Code Name: Mama
Skip to My Lou
Secret Mommy


Thursday, December 22, 2011

My Gingerbread Cookies!


For several years when I was still teaching I made these gingerbread cookies and gave them to my colleagues for Christmas.  It was a thoughtful and inexpensive way to say thank you for all of their help throughout the year.  These cookies were always a big hit!  

If you would like to make some, I should tell you that they do take a little more time than some other holiday cookies, but they are pretty simple to make.  White chocolate, instead of the usual sugar frosting, give these cookies a special and unexpected touch!

You can use any gingerbread dough recipe for these cookies.  My favorite is the one for "Gingerbread Cutouts" from The Better Homes and Gardens New Cookbook, which I have included at the bottom of this post.  Once you finish making the dough it needs to chill for at least three hours before you can roll it out and make the cut-outs.  I like to use a large star-shaped cookie cutter, but you can make whatever shape(s) you like.  I also sometimes make some gingerbread people.  I have found that lining my baking sheet with parchment paper, instead of greasing it, makes it easier to get the cookies off the baking sheet without breaking them.  I should also add that if you use the recipe below, and you use large cookie cutters like I have, you should expect to get about 10 cookies per batch of dough.


Once you have made your cookies and allowed them to cool, you can get ready to frost them.  You will need some white chocolate (or other candy) disks.  When I first began making these cookies I was able to obtain some wonderful white chocolate from a specialty chocolate store.  Unfortunately, the business closed some years back.  This year, I used some vanilla candy disks (the kind used to make lollipops) from the craft store -- technically not chocolate, but they were still yummy!  More importantly, they were inexpensive, easy to melt, and cooled quickly.


Melt the candy according to the package instructions.  Personally, I like the double-boiler method, but some candies you can even melt in the microwave right in the bag!  If you use the double-boiler method, once the candy is melted, pour it into a sturdy plastic bag (like a Ziplock-type bag).  You will use this just like a pastry bag.  

Cut a small, and I mean SMALL tip off the corner of the bag.  I learned the hard way to not cut the hole too big or you will have melted candy gushing out all over the place!  Use the bag just as you would a pastry bag for doing cake decorating, only decorate the cookies instead.  If the melted candy is oozing out too quickly, you might have to wait a few minutes for it to cool a bit, which should slow it down some.

Your cookies are decorated, so now what?  Well, what I like to do is take the time to get some really nice cellophane bags to package them in.  You should be able to find nice bags at a craft store like Michael's, ACMoore, or JoAnn Fabrics.  Then add a nice Christmas ribbon to finish it off!


 Here is a tip for tying the ribbon to the bag:  Gather up the top of the bag and use a clothespin to hold it in place while you tie the ribbon on.  I usually cut a piece of ribbon about 18" long.  You can always trim a tiny bit off after tying the bow to make the ends look even.  You can add a homemade label or gift tag to the bag as well.  I usually get some store-bought self-adhesive gift tags and stick them to the back side of the bag.


So there you have it!  A pretty inexpensive yet thoughtful gift to give someone you just want to say "Thank You" to.  These are perfect for co-workers, teachers, hairdressers, mail carriers, etc.  I can guarantee you they will love them!


The following recipe is my slightly altered version of "Gingerbread Cutouts" from The Better Homes and Gardens New Cookbook (1996 edition).


Gingerbread Cookies

Ingredients:
½ Cup Shortening                                ½ tsp. Ground Cloves
½ Cup Sugar                                        ½ Cup Molasses
1 tsp. Baking Powder                            1 Egg
1 tsp. Ground Ginger                            1 Tbs. Vinegar
½ tsp. Baking Soda                              2 ½ Cups All-Purpose Flour
½ tsp. Ground Cinnamon

In a mixing bowl beat shortening with an electric mixer on medium to high speed 30 seconds.
Add sugar, baking powder, ginger, baking soda, cinnamon, and cloves.
Beat until combined, scraping bowl.
Beat in the molasses, egg, and vinegar until combined.
Beat in as much of the flour as you can with the mixer.
Stir in remaining flour.
Divide dough in half.
Cover and chill for 3 hours or until easy to handle.

Grease a cookie sheet; set aside.
OR line a cookie sheet with parchment paper.

On a lightly floured surface, roll half the dough at a time to 1/8 inch thick.
Using a cookie cutter, cut into desired shapes.
Place 1 inch apart on the prepared cookie sheet.

Bake in a 375ºF oven for 5 to 8 minutes or until the edges are lightly browned.
Cool on cookie sheet 1 minute.
Transfer cookies to a wire rack and let cool.
If desired, decorate cookies with icing and candies.

For Gingerbread People:
Prepare as above, except roll dough to ¼ inch thick.
Cut with 4 ½ to 6 inch people-shaped cookie cutters.
Bake in a 375ºF oven for 6 to 8 minutes or until edges are lightly browned.

Tuesday, December 20, 2011

Easy & Elegant Tissue Paper Flowers


Make these beautiful tissue paper flowers to add a handmade touch to your gifts this year!  All you need to make them is some tissue paper, a pair of scissors, and a piece of string.


Let's get started!  

First, cut your tissue paper into approximately 6" squares.  There is no need for exact measurements here (The larger your squares, the larger the diameter of your flower will be).  I took my tissue paper and folded it into thirds the long way, cut three equal-sized strips about 6" wide, then folded those strips in thirds and cut them to get a bunch of squares.  For really full flowers like these here, plan to use 5 - 6 squares of tissue paper per flower.  You can use less, but they just won't be as full.  The more you use, the fuller the flowers will be.

Stack your tissue paper squares directly on top of one another.  


Beginning at one end, accordion fold the squares, as you would if you were making a paper fan.  Make a fold about every 1/2 inch or so.  


Keeping the tissue folded, find the center (I do this by folding it in half) and cut two small slits on either side of it.  Your slits should be perpendicular to your fold lines.  Do NOT cut all the way through the middle!   Just cut close to the middle without actually going through.  You are cutting these slits for the cording that you will tie to hold the layers of the flower together.


Cut an approximately 18" long piece of cording (or yarn, string, ribbon, whatever you have on hand), and wrap it around the center of your accordion folded tissue.  Do this in such a way that the cording slides into the slits you made in the previous step.  Then tie it in a knot to secure.  Leave the ends of the string.  You can use these to affix your flower to something when you're finished.

Next take a pair of scissors and cut the ends of the accordion into a nice curved shape.  Doing this will give your flower pretty, rounded petals.


Now comes the fun part!  


Spread open the accordion folds.  

Starting with the top layer, CAREFULLY pull up each layer of tissue paper toward the center of the flower.  
As you do this, you will begin to see your flower take shape.  I recommend doing the top layer on each side, then moving on to the second layer on each side and so forth until you have pulled apart each of the six layers.


Tie your flower to a wrapped package, a gift basket, or a bottle of wine!  You can make an entire bouquet if you like!  Just use some green pipe cleaners instead of the cording to tie off the center of your flower and form it into a stem.  Layer different colors of tissue paper instead of using just one color.  Let your imagination go wild.
  

Have fun!

Wednesday, December 14, 2011

Crocheted Snowflake Ornaments


Need a quick and elegant last-minute project for the holidays?  How about making some crocheted snowflake ornaments?  All you need are basic crochet skills, a few simple supplies, and you can make a couple of these in an hour.


Some of the patterns I used for these snowflakes are from the book Beyond the Square:  Crochet Motifs.  The designs I chose can be found in the hexagon section of the book.  I also tried a couple of the free snowflake design patterns on the Lion brand web site.


For the snowflakes shown here, I used "Vanna's Glamour" yarn in "diamond," which is a white yarn with a silver metallic thread woven throughout.  I like this yarn because it gives the finished snowflake a little sparkle without my having to do the extra step of adding glitter during the stiffening process.  
I used a size D3/3.25mm crochet hook to get the size snowflakes I wanted.  You could certainly use a larger hook with this yarn.  Experiment to see what you like.


Once you have crocheted your snowflakes, you will probably want to use some sort of stiffener to finish them off.  I used a simple method of dipping them in a mixture of equal parts white glue and water.  I first measured and mixed up the glue and water.  Next I saturated the snowflake in the mixture and squeezed out the excess.  Then I lay it flat on a tinfoil-covered piece of cardboard (thicker is better).  I used sewing pins to keep it in place while it dried -- about 24 hours.  

There are many different methods out there for stiffening crocheted snowflakes -- spray adhesive, glues, starch.  For your convenience, I have included a list of web sites that I found particularly helpful at the bottom of this post.


There are many different ways to give these beautiful one-of-a-kind ornaments.  Besides giving them as stand-alone gifts, you can use them to embellish a store-bought gift.  
How about giving one to your child's teacher (along with a thank you card made by your child)?  
How about leaving one in the mailbox for your mail carrier?  
Slip one over the neck of a bottle of wine for a lovely hostess gift.  
Making a gift basket for someone on your list?  How about replacing the bow with a snowflake instead?  
The possibilities are endless!  
No matter how you decide to give them, I hope you have fun making these simple, inexpensive, and elegant gifts for your friends and family!


Want to learn more?  Check out some of these web sites:

Yarnovations
Click to download the free snowflake crochet patterns.  It will take you to a pdf file.  Pages 2 and 3 of the pdf file have some great information on stiffening and describe a few different methods.


JPF Crochet Club
Click where it says to download the free pdf file for the snowflake pattern shown.  If you read through the pdf file, you will see a description of how to stiffen the snowflake using fabric stiffener.


eHow
This page describes how to starch a crocheted snowflake.


Tangleweeds
Great site with lots of information about making crocheted snowflake ornaments.

Sunday, November 27, 2011

So Many IDEAS, and So Little Time

I have a love/hate relationship with the Internet.  I can't decide if it is a good thing or a bad thing -- especially when it comes to providing creative inspiration.  At times, it is a blessing -- I love the ease and speed with which I can find just the right thing I am looking for.  At other times, however, it is just too overwhelming.  And at those times, I just don't know where the time goes.  It's as if time has ceased to exist for me.  Then I look down at that little clock at the bottom corner of my screen.....Wow!  WHAT time is it?  It can't really be THAT late?  Can it?  Time for bed.  My ideas will have to wait until tomorrow.....

Tuesday, October 11, 2011

Apple Tree Art Idea


Here is an apple tree we made for our wall!
(This activity is appropriate for preschool-age children).


Before doing the art activity, we read a couple of library books about apple trees.


I prepared the tree ahead of time so it would be ready after we read the books.  I got a piece of green poster board from a dollar store.  I cut it into the shape of a cloud to be the top of the tree.  Then I cut open a paper grocery bag and cut out the shape of a tree trunk from that.


Next I cut an apple in half and then let the children take turns dipping the apple half into red paint and stamping it onto the tree.  We did this step with the green part of the tree lying flat on a table (not with it hung on the wall yet).  The kids loved "decorating" the tree with apples!


After letting it dry, I hung the tree on the wall with blue painter's tape (so it won't peel the paint off the wall when I remove it).

Monday, October 3, 2011

Alphabet Magnets

Oh, how I love my laminating machine!  Before I had my own I was constantly borrowing my mother-in-law's.  Last year, my husband bought me my very own for a Christmas present.  Since then, I have used it to do many different types of things.  I thought that today I would share an example of something I have done with my laminating machine.

At the end of the summer I was in a dollar store looking for some activity workbooks for my kids.  I came across a set of alphabet cut-outs (the kind teachers would use on a bulletin board).  When I got them home and opened them, I realized the paper used to make them was quite flimsy (that's what I should expect from a dollar store, I suppose).  But, never fear, my laminating machine is here!


As I was laminating all the letters, I decided "hey, why not go one step further?"  So, I bought some adhesive magnetic strips from the craft store, and now I have some really nice alphabet magnets for our refrigerator!

But I didn't stop there.  No, I did not.  I went online to search for free clip art of objects that start with the letter A.  I printed these onto some white card stock, cut them out, and laminated them too!  Now we have letters AND pictures to go with the letters, reinforcing the beginning letter sounds for my kids.  So far, I have done pictures for the letters A, B, and C.

Take a look!
Not bad, huh?