Here are the start-to-finish pictures I took as I documented my progress.

The first pictures I took were when I was trying to establish the layout of all the blocks. I carefully chose fabrics with pictures of things my son really likes -- trucks, cars, trains, bugs, Peanuts, and other cute images. Some of these fabrics I had in my stash, while others I went out and purchased especially for this quilt.

Next I "fussy cut" images from the fabrics and chose brightly colored prints from my stash to make borders around each image. The trickiest part here was dealing with all the different sizes of the center pieces on these blocks.

To deal with that, I just decided on a finished block size (in this case, 8") and then cut the border pieces whatever size I needed to make the blocks 8 1/2" (this included the necessary 1/2" seam allowance). I actually made all the blocks slightly larger than 8 1/2" so that I could trim them to exactly 8 1/2" with my rotary cutter and ruler -- just more accurate that way.

As I worked on this, I tried to keep it layed out on the floor, so that I could make the right color selections for each block. I didn't want to end up with blocks of the same color adjacent to one another. I also didn't want to end up with clusters of similar colors -- like too many red, orange, and yellow blocks placed together.

Once I pieced all the blocks, I began working on the border design. I decided I wanted to try something a little different than the typical plain border. So, I decided to try doing these prairie points. They are really just squares of fabric folded and then inserted into the seam between the quilt and the border.

This is where I was just laying out the triangles to see if I liked them against the blue border. I was also trying to determine how wide I wanted to cut that blue border strip.
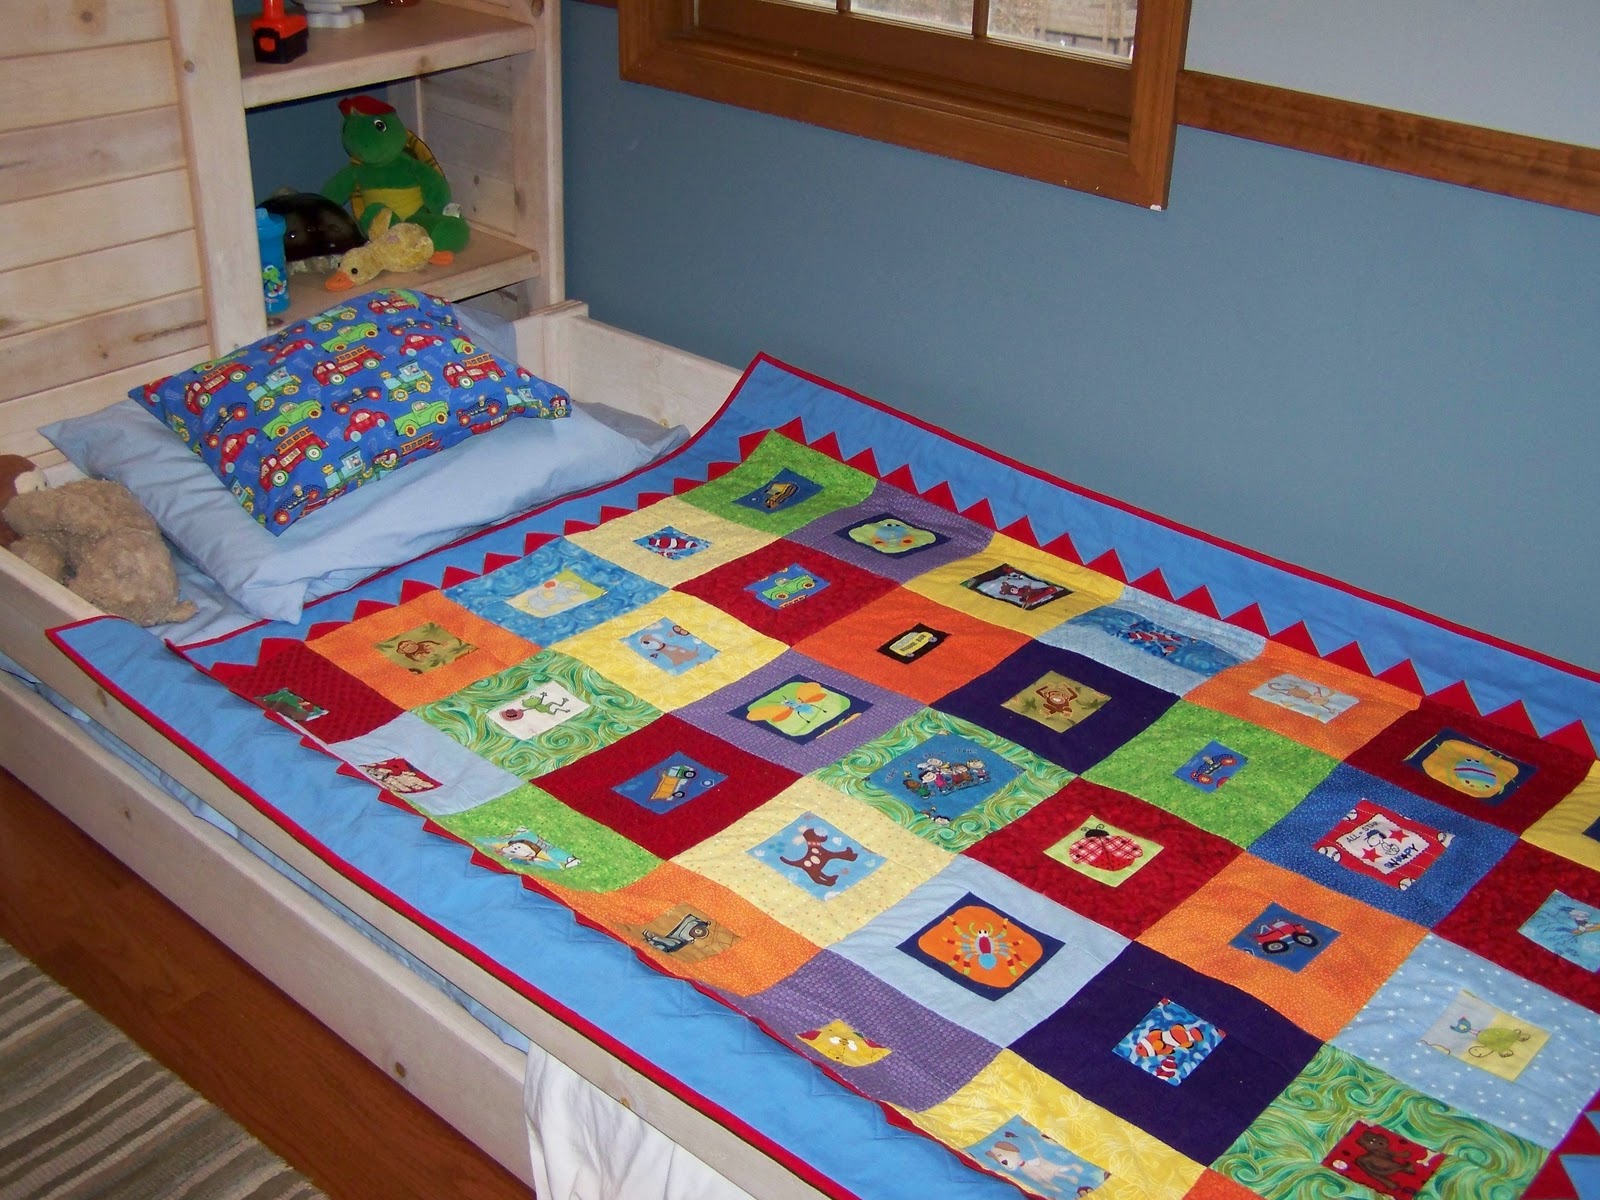
Here is the finished quilt on my son's bed (he is 3 years old) and a matching pillow that I made for him. It's hard to see the quilting in this, but it IS quilted. I machine quilted in the ditch around each block and center image. I also quilted around each prairie point in the blue border. I'm still working on perfecting my machine quilting skills. For the most part, I am a hand quilter. As I'm making more quilts though, I have been trying to work on improving my machine quilting. Without a long arm quilting machine, I find it a rather challenging task.

Thanks to a nice woman in my quilt guild, I made this very practical and cute backing out of my leftovers. All of these fabrics were used somewhere on the front of the quilt. And there is my son rolling around on his new quilt!

Sprawled out on his new quilt! Now all I have left to do is add a label!
No comments:
Post a Comment