 |
| Pink & Green Stars, 2005 |
For a long time before making this quilt, I had wanted to make a pink and green quilt -- so here is what I created -- the Pink & Green Stars quilt!
I made this quilt for myself -- my own design. It is machine pieced and hand quilted. Each of the star blocks are 12" x 12". The overall size is 76 1/2" x 102" (approximately queen size). This is pre-Electric Quilt era, so I painstakingly drafted this entire thing on graph paper -- made the first sketches during a faculty meeting at school (tsk, tsk)! At the time I started this quilt, it was good "therapy" for me. I think I started this in the summer of '03. I remember working on the quilting at the lake my first year up there ('05). So, I must have finished this in 2005 or 2006. Of course, like most quilts in my house, I didn't make a label when I finished it. I keep saying I'm going to go back and do that one of these days....but I never seem to get around to it!

It may not look like it, but a lot of careful planning went into the color selection and placement of each star block. If you don't balance the value (lights, mediums, and darks), you can end up with a not-so-good-looking quilt. As with the bunny quilt, I made extra star blocks so that I could "audition" them before making my final decisions on what to include in the finished quilt. I think I ended up with two or three "rejects."

Notice how some fabrics are "working" as darks, some mediums, and some lights. Some of the darks might not be considered dark in another quilt. Value is all relative. It just depends on what other fabrics you're using next to one another.

Again, as in some of my other quilts, I tried to use a variety of prints and scale. Some are flowery, while others are geometric, but they all work because they compliment each other.

Here's a good example of a star block that uses dark, medium, and light fabrics. The star points are dark, the large square is light, and the center square is medium. You may also be able to notice here the stem and leaf quilting design in the checkerboard border.

One of my favorite stars is this one in the middle here. I love the fabrics for some reason. There is a flower quilted in the center of it, but I don't think you can see it very well in this picture.

In the alternate blocks between the stars, I quilted a feathered design. I used a pattern from a quilting magazine for this. I had to draw them all onto the quilt first. I used a makeshift tracing table -- an old end-table that I cut the center part of the top out of using my Dremel saw. Then I covered over it with a piece of Plexiglas screwed to the top. Next I put a desk lamp pointed up underneath and voila -- my very own, inexpensive tracing table!

Here is a closer shot of the feather quilting. If I remember correctly, I think it took me about three hours to quilt one of these blocks. There are 17 of them in the quilt. So, for those of you that are counting, that would be 51 hours on these blocks, alone.
I typically don't think about this stuff until well after I'm done with a project...that's probably a good thing. And I usually hate when someone asks me "how long did THAT take?" Not because I don't want to tell people, but I don't usually have any idea how many hours something took. Unless I'm going to make something for a gift or I have a deadline, I don't usually take "time" into account when I start a project. I am thinking about what I want the finished project to be and whether or not I am going to enjoy the process. I can tell you in terms of months or years, but I may have worked on three different projects during the same time-frame, so it's not really a good answer.
Here is a close-up of my quilting stitches. Remember, this is all quilted by hand -- no machine.
The goal when hand quilting is to make the stitches as even as possible. The smaller the stitches, the better. Although, making the stitches even is more important than making them small. Accomplished quilters have spent hours upon hours perfecting their skills. My stitches on this quilt average 8 stitches to the inch. For comparison, 6 stitches/inch is considered "average." 8 stitches/inch is "accomplished." And anything more than 10 stitches/inch is considered "Expert." So, I guess I'm officially "accomplished"!

Okay, so here's an example of what not to do and my big lesson learned:
If you're too lazy to do the math for the checkerboard border, then it is better to "trim" some off and not have perfect squares, than to try and "force" it to fit. As you can see here in this photo, there is a lot of stretching and puckering of the green border fabrics in this quilt. This would NOT go over well with the judges at a quilt show!
I probably would have been better off to just trim the checkerboard a little to make it shorter, so I wouldn't have to stretch anything to make it fit.

Another example of how the green inner border is puckered and wrinkly due to my forcing it to meet up with the checkerboard border at the corners.
All lessons learned have a purpose -- in a later quilt that I made for Caroline, I remembered my mistake here and did things a little differently.

So, ignoring all that puckering in the green borders.... you may be able to see the vine and leaf quilting in the checkerboard border here. I used a stencil to mark the design before quilting it.

I did this "spiral" quilting in each plain center square. I think I started on the outer edge and worked my way in. I didn't mark the lines -- I just measured by eye. I think each row is about 1/2 inch apart.

I quilted this flower pattern in the center of each square-within-a-square star. It was a stencil.

Maybe you can see the leaves here?

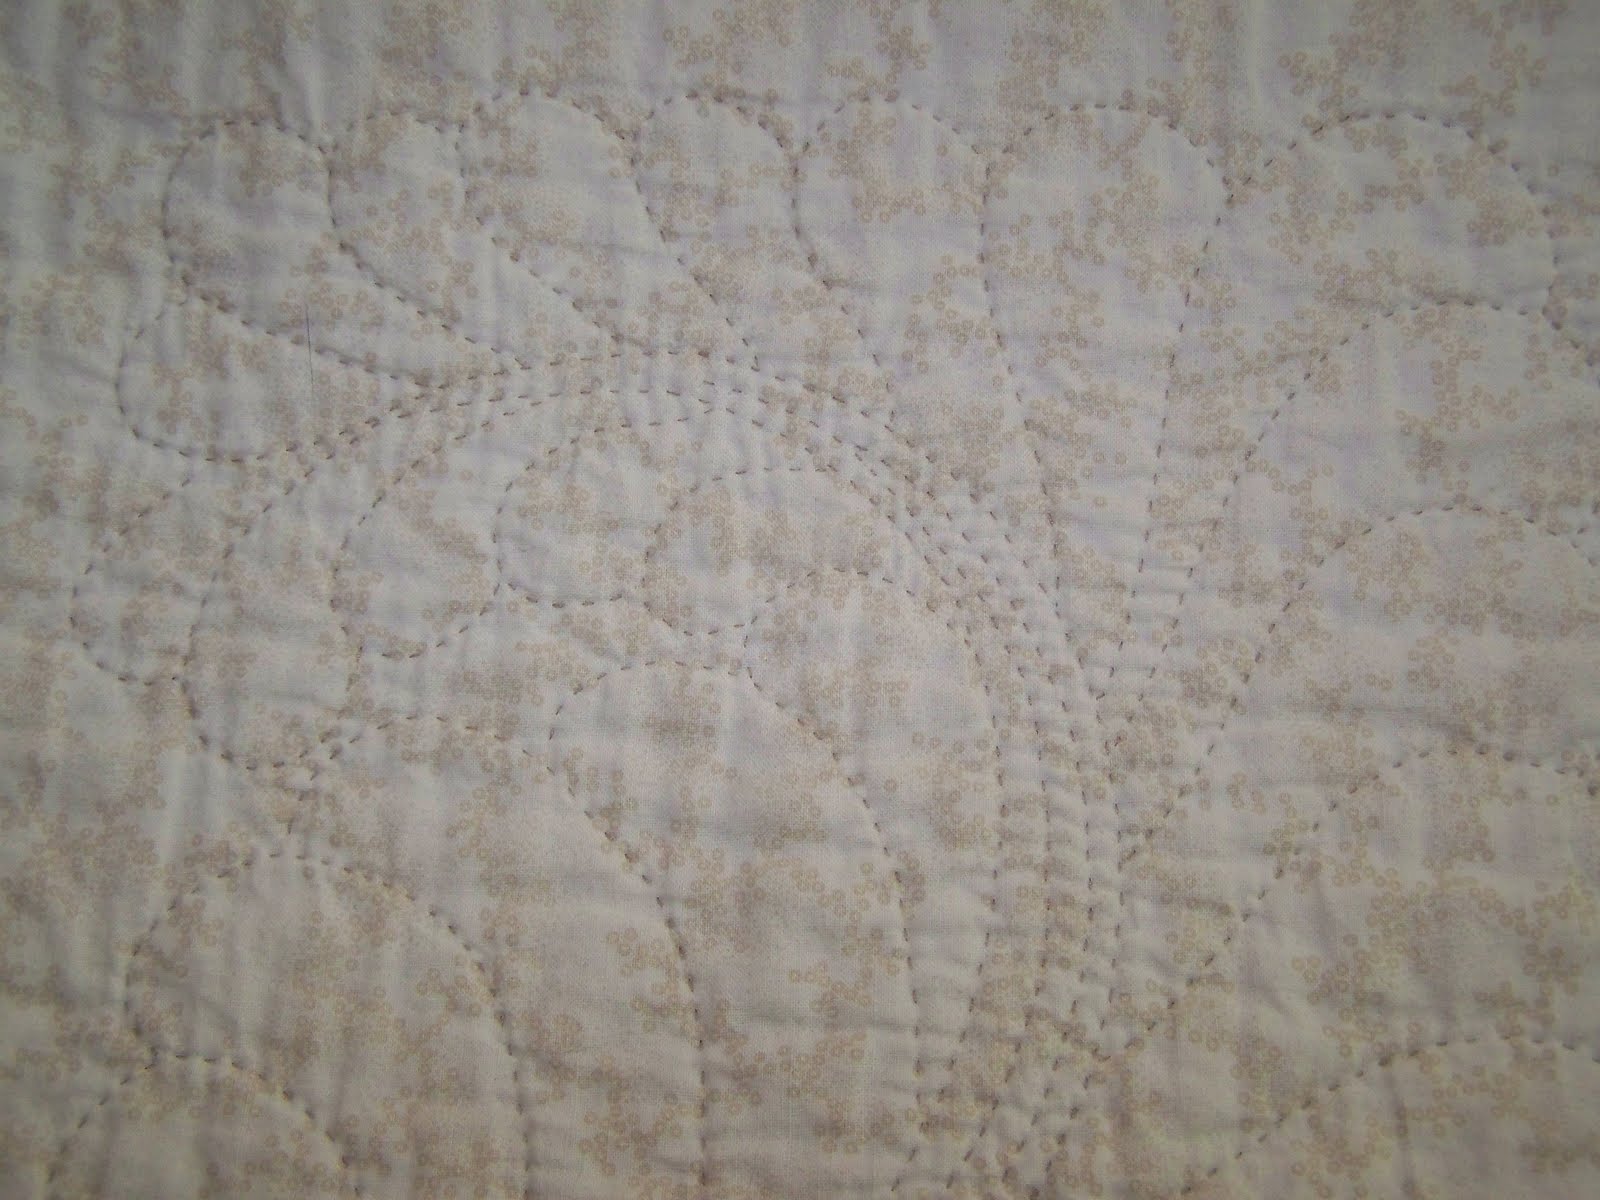
Here is the back. It doesn't look like much from a distance.

There we go...now you can see some detail.

This is one of the four-square stars.

And here is a spiral one.

Feathers.

Close-up of feather quilting from the back side.

Now you can definitely see those leaves!

Uh, oh, more puckering....this happens on the back when you don't baste everything perfectly before beginning to quilt.
Let's just move along, shall we?

Oh, my lovely binding! By this time, I have really perfected putting on a binding. Can you see my tiny hand stitches? The binding is sewn by the machine on the front side and then rolled over to the back to be hand-stitched down.

And if you know what you're doing, the corners of your binding should look like this!
No comments:
Post a Comment